


Product Description
Watch the set-up and use video here.
This listing is for the dial and adjustment knob only. Grinder is not included.
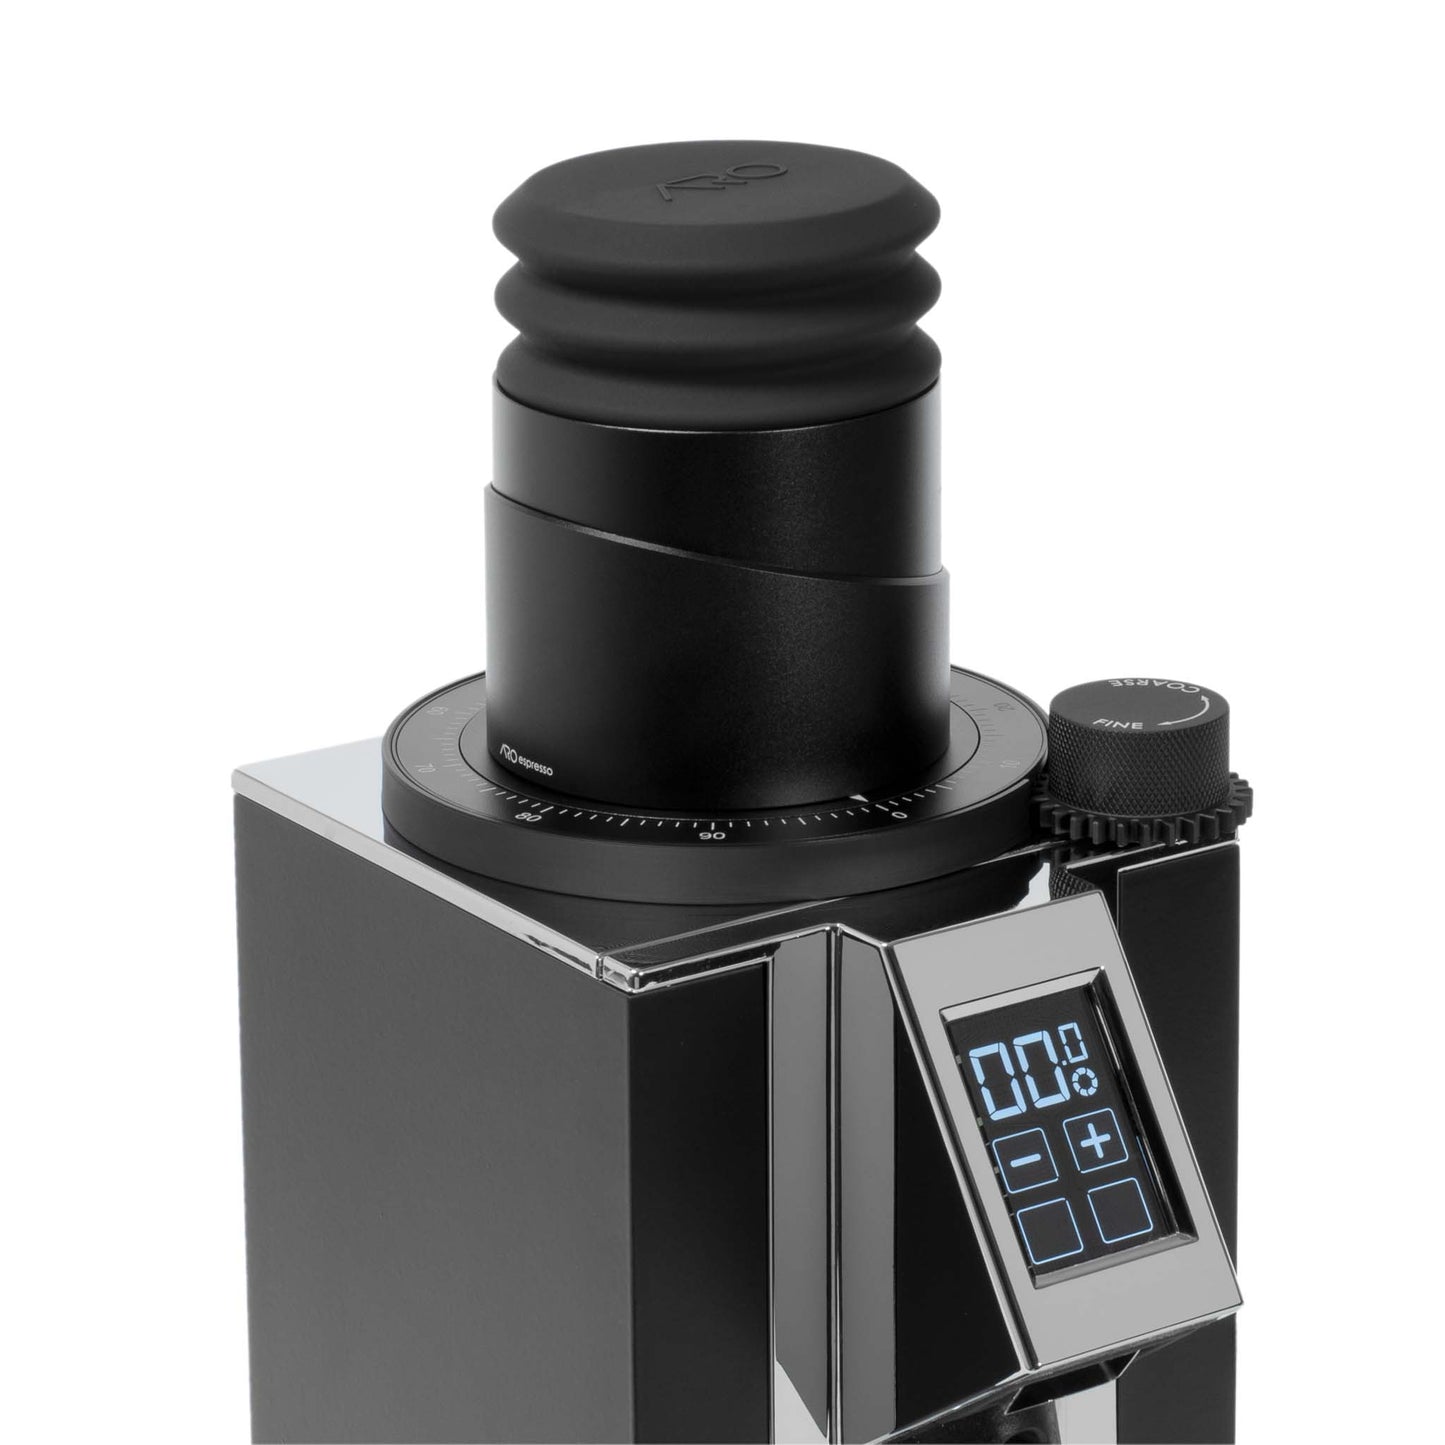
Introducing the ARO® Aluminum Grinder Setting Dial for Eureka Mignon, the ideal solution for achieving a precise and accurate grind setting on your Eureka Mignon every time. Gain ultimate control over your espresso brewing process.
This product is designed specifically for the Eureka Mignon series grinders and is durable, reliable, and easy to use. It solves the problem of losing your reference point when switching between grind sizes. You can easily adjust the grind size between espresso, pour-over, and French press, and the numbered dial ensures that you can always return to your preferred setting with ease. No more wasting precious coffee to dial in the grind again.
The ARO Espresso™ Grinder Setting Dial and Adjustment Knob is a two-piece tool that is simple to install and will change the way you grind coffee in your Mignon. The grinder setting dial has 100 increments so you can dial in your grind size with precision. The geared grind adjustment knob is more ergonomic and easier to rotate than the stock knob. It uses a 3:1 gear ratio, which means three full rotations of the knob equate to one full rotation through all 100 increments on the dial. This lets you make extremely fine adjustments and get the most out of your grinder.
Do not forget to pair it with our ARO Espresso™ Aluminum Single Dose Hopper to complete your set-up for the ultimate single dosing combo.
Key Features
- Solid aluminum adjustment knob: Aluminum is far superior to plastic for this application. The aluminum threads ensure the knob does not strip, your grind setting does not drift, and the assembly is built to last.
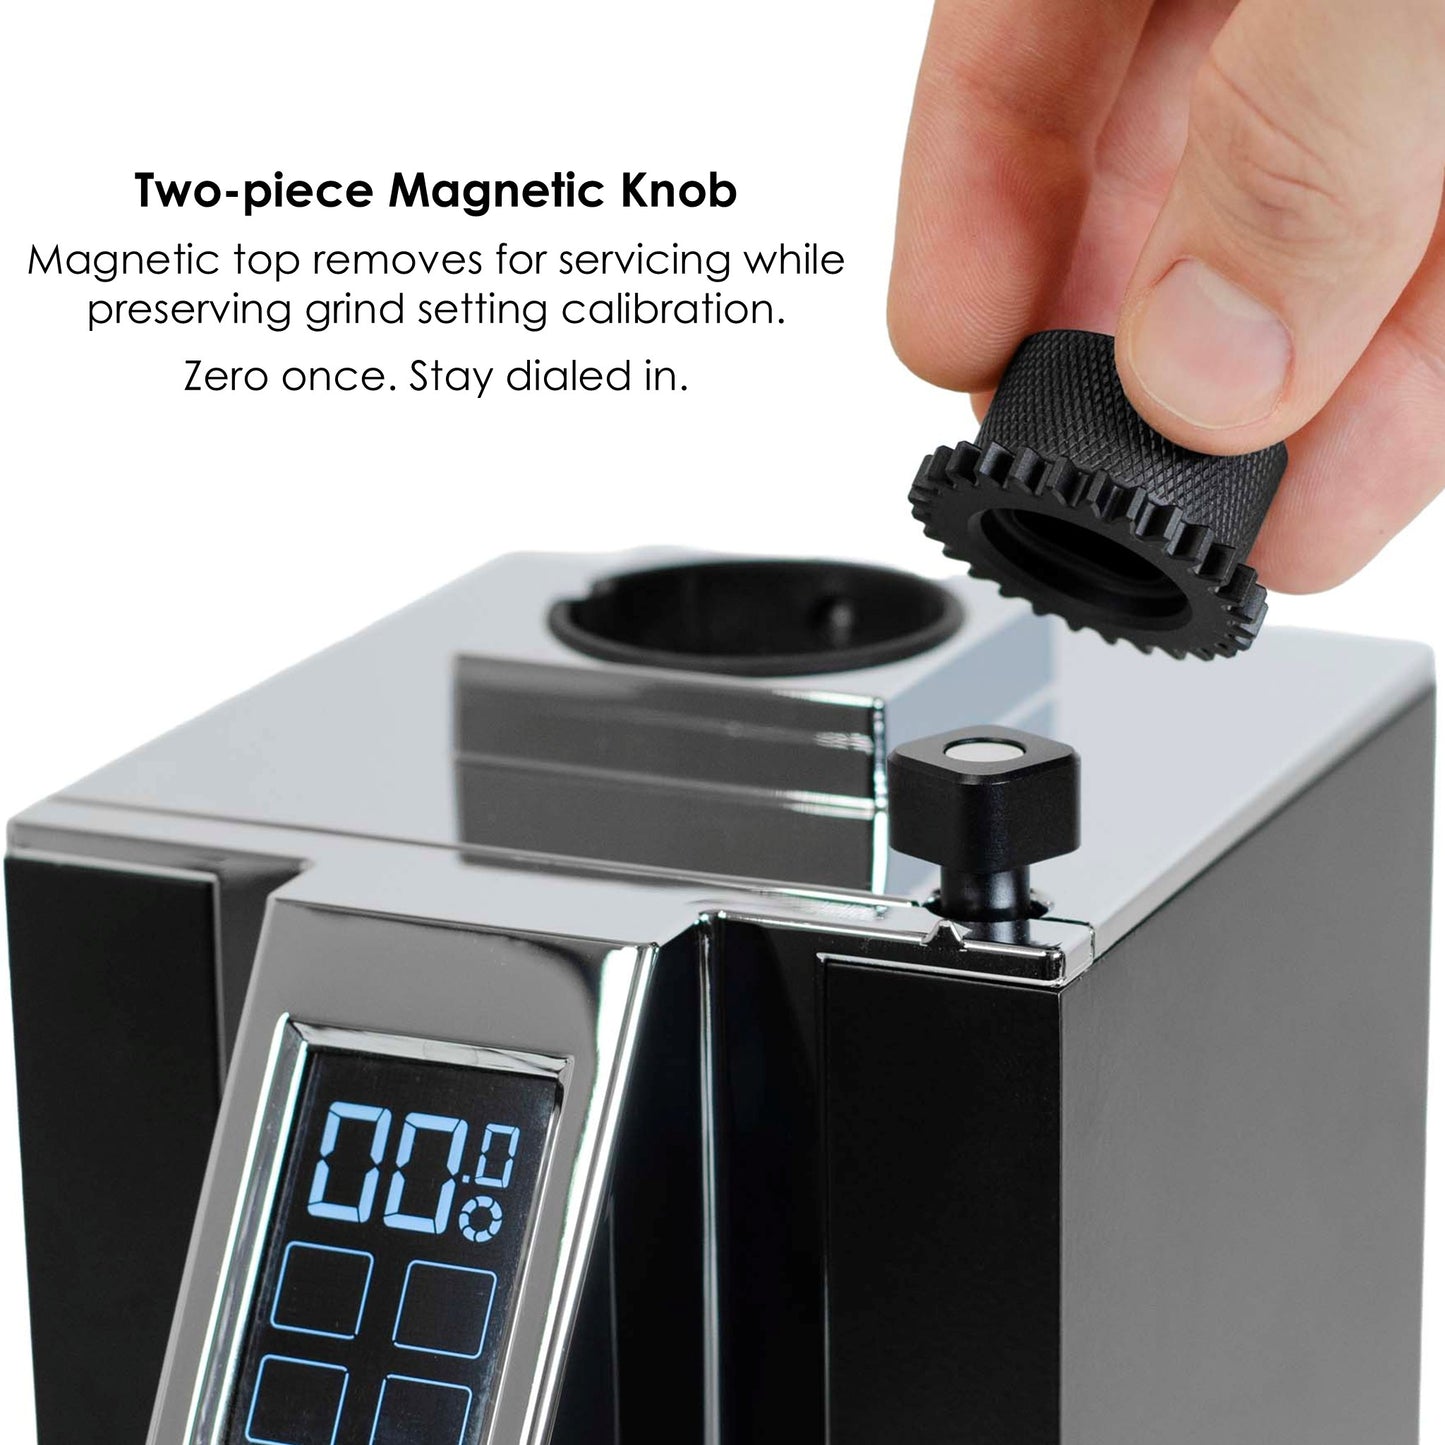
- Magnetic two-piece knob upgrade (optional): Magnetically coupled two-piece design that lets you remove the top plate for cleaning without unscrewing the knob or disturbing your grind setting. The square interface and four-position symmetry ensure perfectly repeatable alignment every time the knob is reattached.
- Stunning laser engraved aluminum faceplates: Minimalistic design, matte black finish, and precision laser engraved text make the grinder look like it came stock with this dial.
- Non-marring and non-invasive installation: The faceplates are set into a protective plastic housing that contains the gear mechanism. This protects your grinder from scratches while keeping operation smooth and quiet.
- Matching single dose hopper (optional add-on): Elevate your single dosing experience with a single dose hopper and silicone bellows that integrate cleanly with the dial for a unified look. Available in both premium aluminum and economical plastic.
Magnetic Two-Piece Knob Upgrade Option
You can choose between the standard one-piece geared aluminum knob and an upgraded magnetic two-piece aluminum knob.
With the standard knob, the knob must be fully unscrewed to remove the top cover plate to service your grinder. This means you lose your grind setting and must re-zero after reassembly.
The magnetic two-piece knob option solves this problem. The top section of the knob separates instantly while the lower section remains fixed in place, so you can remove the cover plate for cleaning and servicing without losing your grind setting or needing to re-zero. The square interface and four-position gear symmetry ensure the knob always reattaches in the exact same orientation. No guessing. No re-zero required.
If you currently have the dial and standard one-piece knob and want to upgrade to the two-piece magnetic version, you can purchase it on its own here.
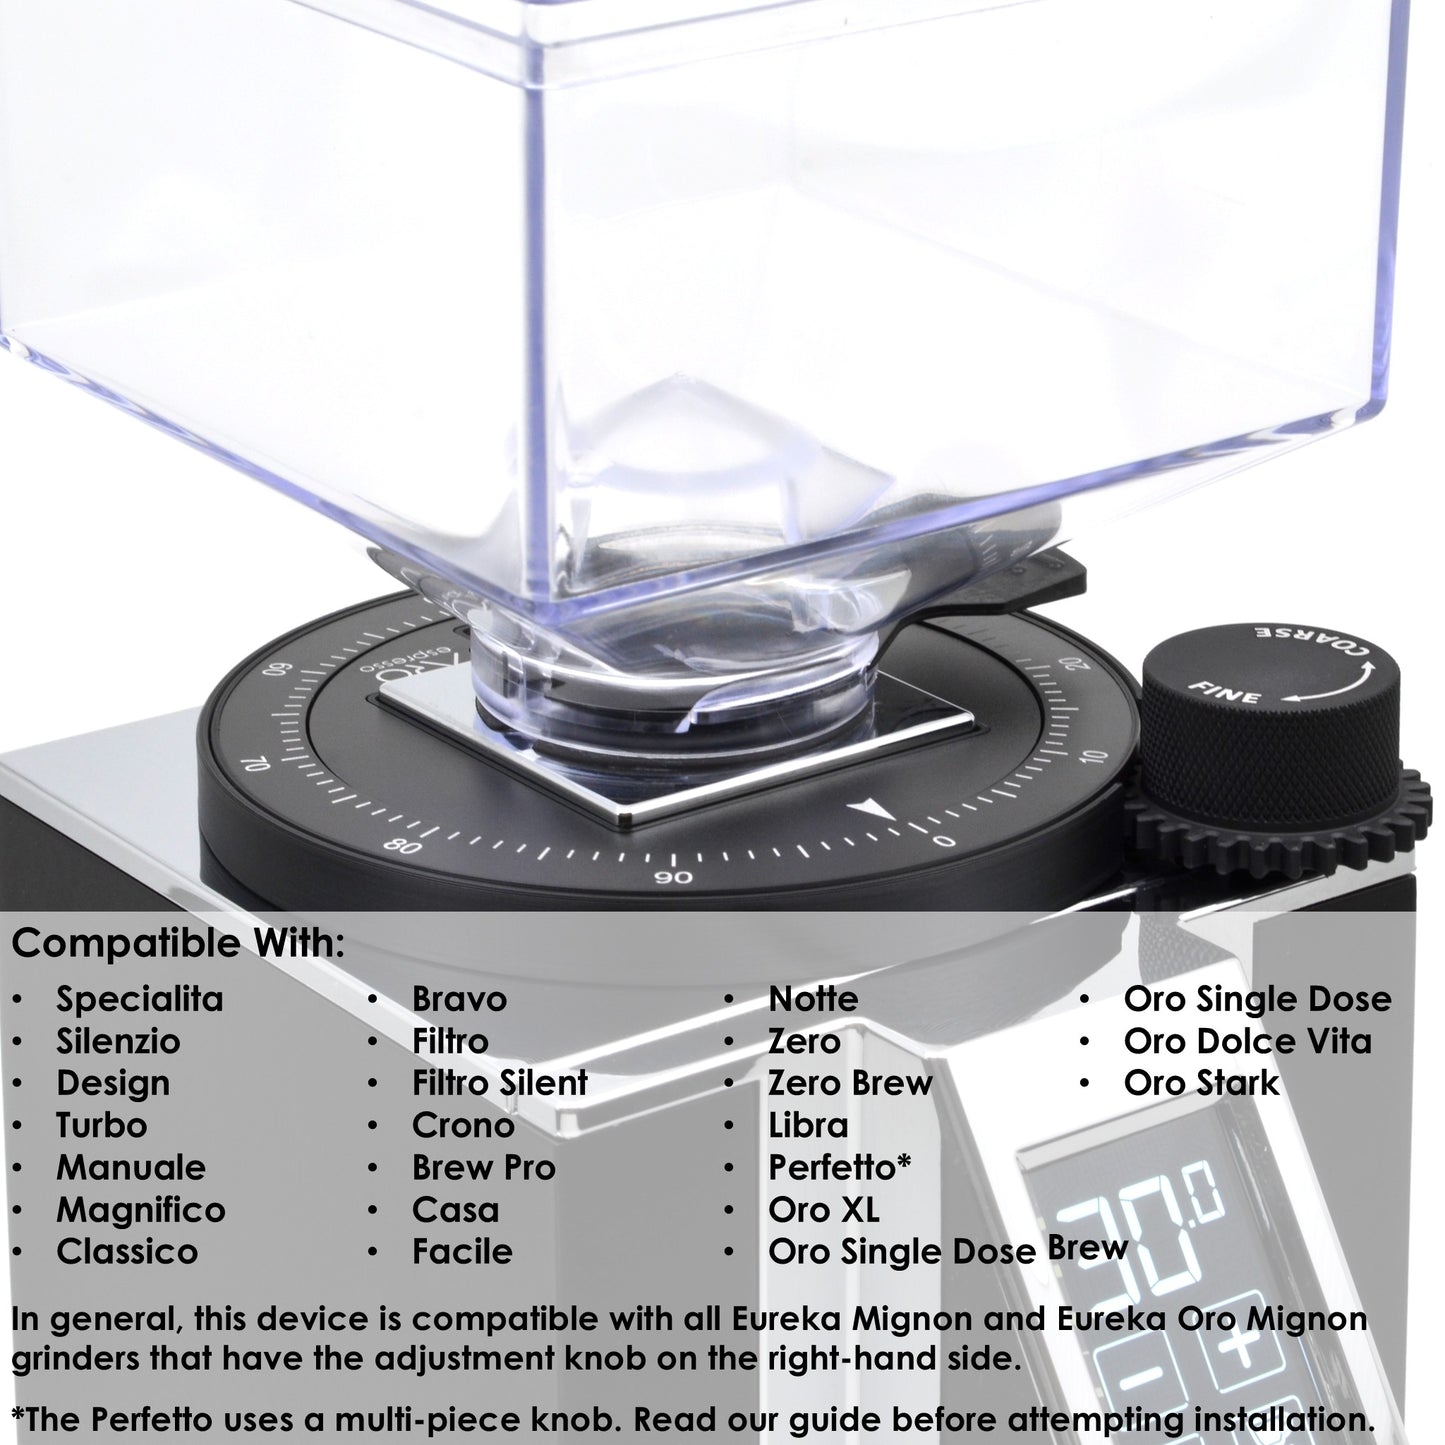
Compatibility
In general, this device is compatible with most Eureka Mignon and Eureka Oro Mignon grinders that have the standard sized adjustment knob on the right-hand side.
This includes the Specialita, Silenzio, Design, Turbo, Manuale, Magnifico, Classico, Bravo, Filtro, Filtro Silent, Crono, Brew Pro, Casa, Facile, Notte, Zero, Zero Brew, Libra, Perfetto*, Oro XL, Oro Single Dose, Oro Single Dose Brew, Oro Dolce Vita, and Oro Stark.
It is not compatible with Eureka grinders that use the larger “King Size” adjustment knob. On these models, once the factory knob is removed, there is a protrusion on the top cover plate that prevents the Grinder Setting Dial from sitting flush. If you have a grinder with the King Size knob, it may still be possible to use the dial by replacing the top cover plate. Please message us for more information.
*Perfetto models require an extra step to remove the stock knob before installation. See our Perfetto Knob Removal Guide for ARO® Grinder Setting Dial if you are unsure how to remove the factory knob.
Please message us with your machine model if you have questions about compatibility.
Set-Up and Use
Installation is straightforward. It is a non-invasive tool that will not damage your grinder and you can remove it at any time. To install, follow these steps:
- Empty and remove the hopper from your grinder. You may need to loosen the screw on the back of the grinder inlet, but there is no need to fully remove it.
- Clean any grounds from the grinder inlet and off the top of the machine.
- Unscrew the stock adjustment knob by twisting it counterclockwise until it fully unscrews and can be removed from the machine.
- Twist on the new geared grind adjustment knob and tighten it until the knob bottoms out and you feel resistance.
- Find the zero point on the grinder (read all additional details below*) with the new knob by turning on your grinder and slowly twisting the knob toward the FINE setting. When the burrs make first contact and begin to chatter, stop tightening the dial and back it off about 1/16 of a turn, or until the chatter stops. This is your zero point.
- On the dial, rotate the gear with the numbers so that 0 is directly under the arrow.
- Position the dial over the grinder inlet with the arrow pointing toward you and press down until the dial contacts the top of the machine.
- Insert your hopper back into the grinder inlet on the top of the machine.
- Secure the hopper by tilting the back of the dial upward and off the machine so that the hopper installation screw is visible. Use a Phillips head screwdriver to tighten the screw.
- Press the dial back down onto the top of the machine.
Congratulations. You have installed the ARO Espresso™ Grinder Setting Dial and Adjustment Knob. Enjoy the ability to dial in your grind settings and get a consistent grind every time.
To dial in your grind, we recommend starting with these ranges and adjusting as needed:
- Turkish: 0 to 5
- Espresso: 5 to 15
- Moka Pot: 15 to 30
- Drip or pour-over: 20 to 40
- French press: 30 to 70
Moving one increment on the dial requires 10.8 degrees of rotation of the knob. This corresponds to 24 microns of adjustment per increment. Rotating the dial one full revolution (from 1 to 100) adjusts the burrs by 2400 microns.
Grinder model, bean type, and bean age can all require adjustments beyond these starting points.
What is in the Box?
- Grinder setting dial with aluminum faceplates
- Solid aluminum geared adjustment knob
- Standard configuration: one-piece geared aluminum knob
- Upgrade configuration: magnetic two-piece aluminum knob (top and base sections)
- Optional add-on: Aluminum single dose hopper with silicone bellows
- Optional add-on: Plastic single dose hopper with silicone bellows
Care and Maintenance
For daily maintenance, simply brush off loose grounds and wipe clean with a cloth.
For a more thorough cleaning, remove the dial and knob. Brush off the dial or use compressed air to blow away dust and coffee grounds. Do not submerge the dial.
The knob can be cleaned with mild soap and water. If you have the magnetic two-piece knob, remove the magnetic top section before washing. Rinse well and dry immediately. Not dishwasher safe.
If you purchased a single dose hopper, remove it from your grinder and hand wash with lukewarm water and soap. Rinse well and dry immediately. Not dishwasher safe.
Other Useful Info
A note on grinder cleaning: To remove the top plate of your grinder for cleaning, you will need to remove either the standard knob or the top section of the magnetic two-piece knob, depending on your chosen configuration. If you are using the magnetic two-piece knob, the base stays fixed and your grind setting does not change. With the standard one-piece knob, you will need to remove and reinstall the knob and then recalibrate to your zero point as outlined above.
If you currently have the dial and standard one-piece knob and want to upgrade to the two-piece magnetic version, you can purchase it on its own here.
The aluminum single dose hopper can be purchased here on its own. Its adjustable accent sleeve keeps the set-up clean with or without the dial. If you are interested in only the plastic single dose hopper, please contact us directly. Note that the plastic hopper is designed to work exclusively with the dial. It does not have an adjustable accent sleeve, so there will be a visible gap between the hopper and the grinder if you try to use it without the dial.